Selenium Webdriver with FitNesse
FitNesse is a software development collaboration tool.
FitNesse enables customers, testers, and programmers to learn what their
software should do, and to automatically compare that to what it actually does
do. It compares customers' expectations to actual results.
In other words,
FitNesse is a lightweight,
open-source framework that makes it easy for software teams to:
1. Collaboratively define Acceptance Tests
2. Run those tests and see the results
Getting
started:
· We can
easily create and edit pages
· It requires no configuration or setup.
· Just run it and then direct your browser to
the machine where it is running
The
Overview of Integrating the Selenium Webdriver with FitNesse:
· Create an
object for Selenium Websriver in a code.
· Pass the
required parameters
· Run the script by using FitNesse tool
Now, we start from the scratch
FitNesse
1st part:
1) Get the latest version of the jar file “FitNesse jar” from the below site http://fitnesse.org/FitNesseDownload
2) Place it in some location in the system and consider
it as Base location
3) Unpack jar by typing the below command after navigating
to the Base location via command prompt
Java –jar
fitNesse.jar
4) Once we got the folder “FitNesseRoot” and unpack
process is over, close the command prompt.
5) Create a new folder “Libraries” in the Base location
(it is used to place our selenium stuff related jars)
Selenium
part:
1) Open the Eclipse IDE
2) Create a new java project.
3) Map the Selenium-Server jar file using Project
properties window
4) Create a package with the name “com.SamplePackage”
5) Create a class with the name “FirstClass”
6) Write the mentioned program in the Link as FirstClass file
7) Convert the program files as Jar file with name “SampleJarFile”
using Eclipse IDE export option
FitNesse
and Selenium Integration part:
1) Place the jar files “SampleJarFile.jar” and “Selenium-Server.jar” in the folder
“Libraries” which is in the FitNesse Base location
2) Start the FitNesse Server from the
base location by using below command in the command prompt
java -cp
fitnesse.jar fitnesseMain.FitNesseMain -p 8080 -e 0 -o %1 %2 %3 %4 %5
Here,
I have given the port no as 8080. If you are getting any message like “Port
8080 is already in use.”
Then
use some other ports. Say 8081, 8082, 8083…
3) Open the browser and type the below
address url to view the FitNesse wiki page
4) You can see the FrontPage of the
wiki page.
5) Click on “Edit” next in the “FrontPage” and you will get the Text box to create the page.
6) Enter our first wiki page with the
name as “FirstWikiPage” .(Note:
you have use camel letter to name the wiki pages)
7) Click on “Save” button
8) Click on the "?" link which displayed next to "FirstWikiPage" text and Navigate to that page
9) To get the Tree Hierarchy structure
for our test execution, we are going to create Test suite and Tests
10) First Click on the “add child” link
next to the text “FirstWikiPage”
11) Enter the Test suite name “FirstTestSuite” in the context text area and select “Suite” option from the dropdown
12) Click on “Save” button
13) Now, the Test suite will be listed
under “FirstWikiPage”
14) In the Test suite page
“FirstTestSuite”, we have to define the Test system of the FitNesse framework
and also we need to mention Class path of the selenium scripts.
15) Click on the link “FirstTestSuite”
and it will open the corresponding page
16) Click on “Edit” button from the left
page and Paste the below comments
!contents -R3
-g -p -f -h
!define
TEST_SYSTEM {slim}
Class Path
!path Libraries
\*.jar
FirstTestCase
SetUp
TearDown
FirstTestCase
SetUp
TearDown
17) Now inside the page “FirstTestSuite”
we have to create
a. Tests page (activites which we need
to verify in the application)
b. SetUp page (Initial step to perform
before Tests page execution)
c. TearDown page (Final step to perform
after Tests page execution)
Note: Once we created the
SetUp and TearDown page. It will display for all the tests by default.
18) Create the test page with the name
“FirstTestCase”, SetUp page with the name “SetUp” and TearDown page with the
name “TearDown”
19) When creating the test page you have
to select the“TestPage” option and when
creating the “SetUp” & “TearDown” page you have select the “StaticPage” option from the dropdown.
Note: After creating Test Page, Navigate to Test Page "FirstTestCase" and click on Tools button to select Page type as "test" from Properties.
Note: After creating Test Page, Navigate to Test Page "FirstTestCase" and click on Tools button to select Page type as "test" from Properties.
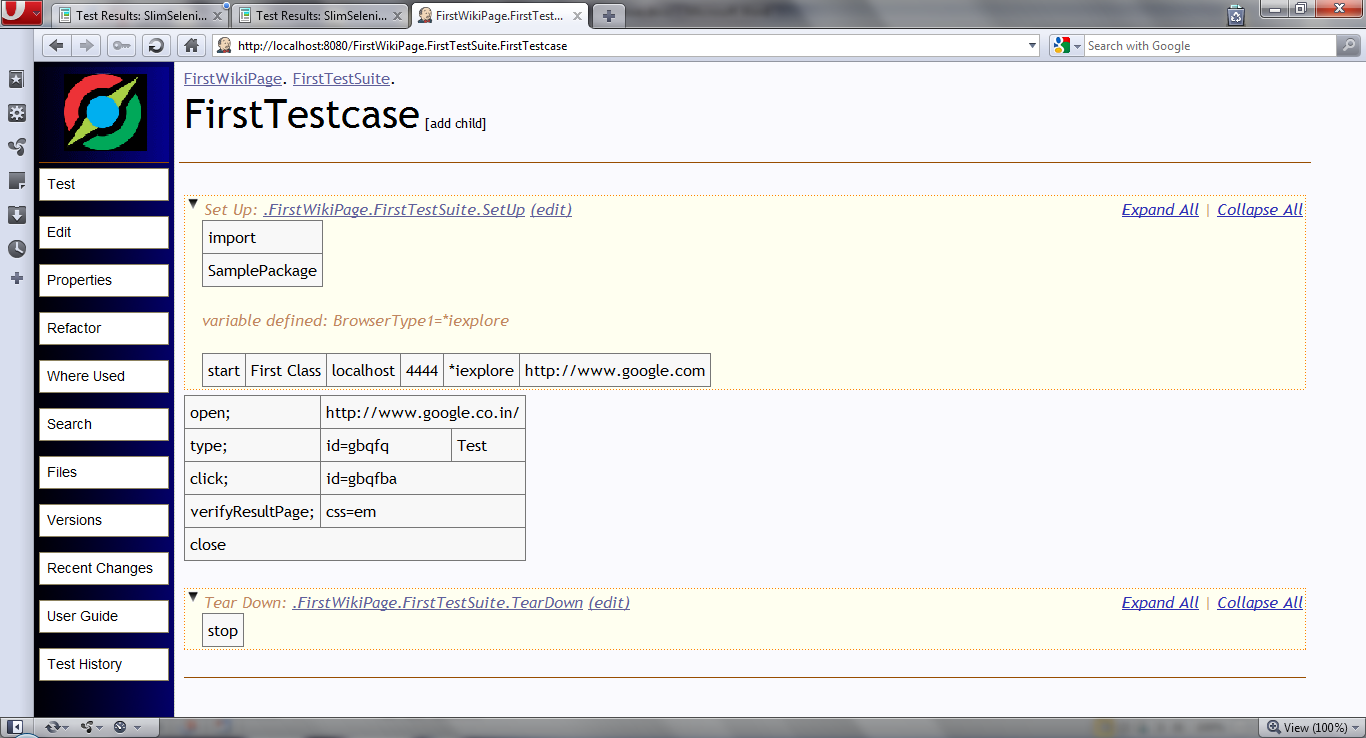
20) Write the comments as below with
respect to the pages
a) Set Up page
!|import |
| com.SamplePackage |
!define
BrowserType {*iexplore}
#!|script|
|start|First
Class|localhost|4444|${BrowserType}|http://www.google.com |
b) TearDown page
#!|script|
|close|
c) FirstTestCase page
#!|script|
|open;|http://www.google.co.in/|
|type;|
id=gbqfq|Test |
|click;|
id=gbqfba|
|verifyResultPage;|
css=em|
And Save it. That’s all now you have created the sample
scripts which open the browser, type the searchkeyword, click the Search button
and verify the result is displayed or not
Execution
part of the selenium webdriver via FitNesse:
After
completing the creation of the page, navigate to the page “FirstTestCase”.
The
page will be looked like below,
Start the selenium server and Click on
“Test” button from the Top right pane of the page “FirstTestCase”. It automatically
invokes the browser performs action defined in the fitNesse page.